How to Host The Front Dedicated Server
Welcome to our guide on setting up a The Front dedicated server, whether you are looking to set up a server for your own personal use or a The Front dedicated server for a larger community to enjoy. Playing multiplayer games on a self-hosted or dedicated server offers players a unique and customizable gaming experience. By setting up their own server, players have the freedom to create their own rules, mods, and gameplay options, leading to a more personalized and immersive gaming experience. By following our step-by-step instructions, you will be able to quickly and easily set up your own The Front self hosted server and start playing with friends or fellow gamers in no time. So, let’s get started and create the ultimate gaming experience with your very own The Front server!
We assume you have already read the in’s and out’s of running your own server, things like the monthly costs, the hardware, and leaving your computer up 24/7. If you have not I recommend starting with this quick read, It can save you hours of time and frustration. I also assume you have already installed WindowsGSM, but if you haven’t start with that HERE.
You can also host this game from GPortal, Paying for hosting has advantages and disadvantages, you can read about those HERE. IF you decide to use paid hosting, friends of the site get 10% off and it helps support me.
Step 1 Find the Server Instructions
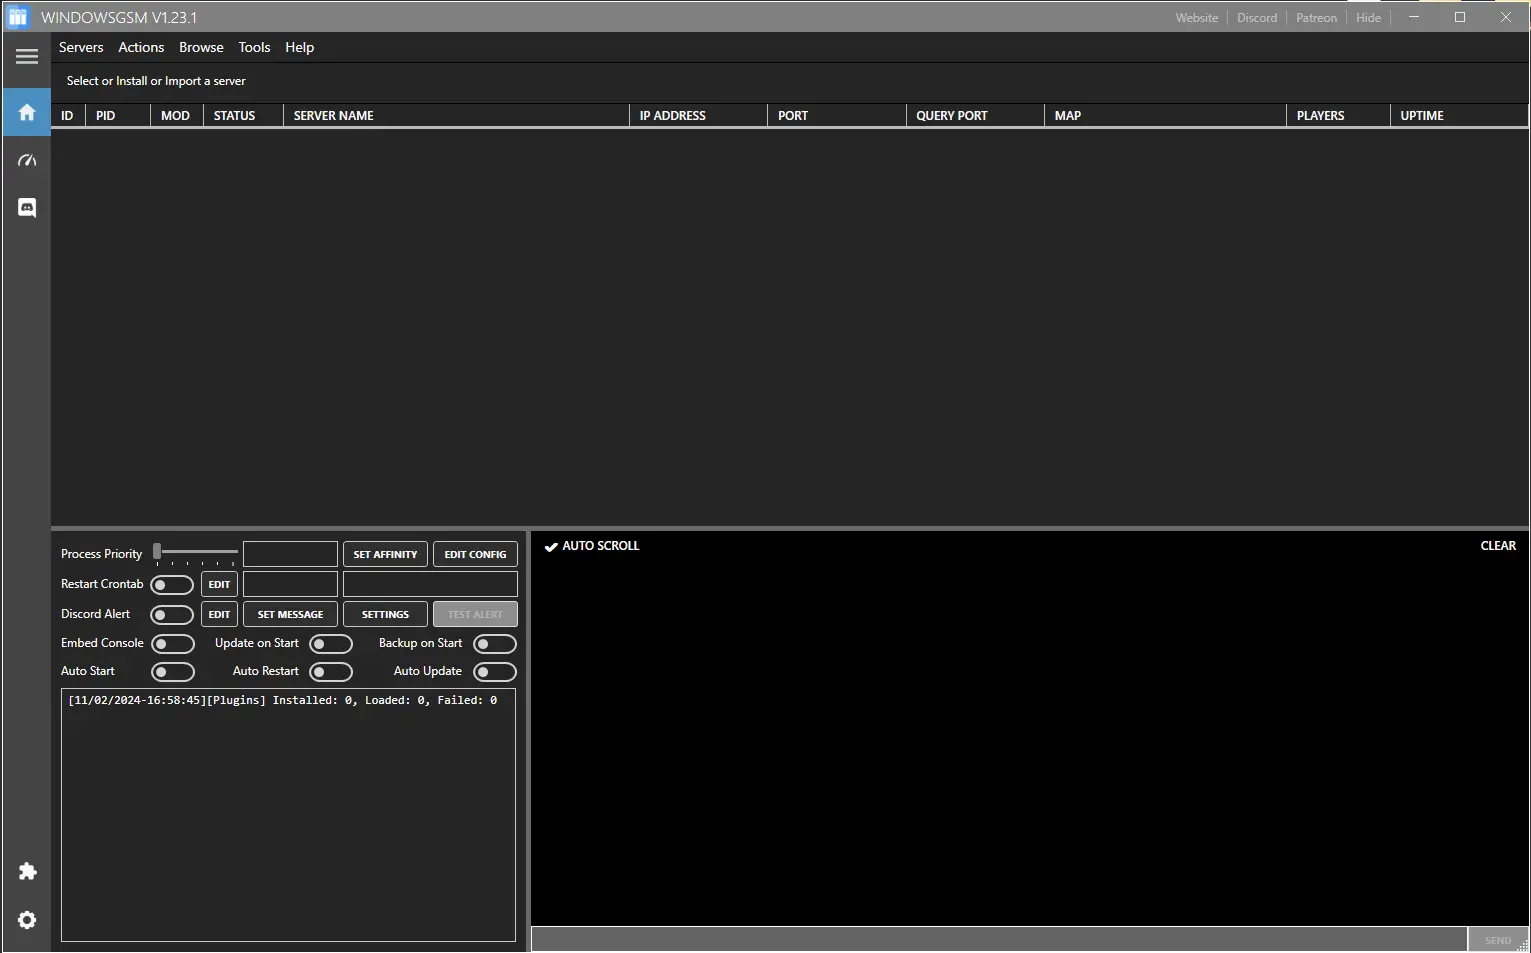
First you need to find your server instructions. Some of the server instructions are built into WindowsGSM and do not require a plugin. Since new games are released all the time many games are not built into WindowsGSM and do require a plugin. The plugin is simply instructions for WindowsGSM to find the server on Steam and install the server inside of WindowsGSM. There are dozens of server plugins that are available for your use, If it is a brand new game you can request a plugin in WindowsGSM Discord. You can find a list of all the dedicated server plugins quite easy on the WindowsGSM website. All of the plugins on that site link out to GitHub. But Alas, I have a direct link to the plugin download just for you!
Download The Front Plugin. Click on the green get code button and download the Zip file.
Download Note++
Step 2 Install the Plugin
In this case a plugin is required and now that we downloaded it we have to insert it into the WindowsGSM program.
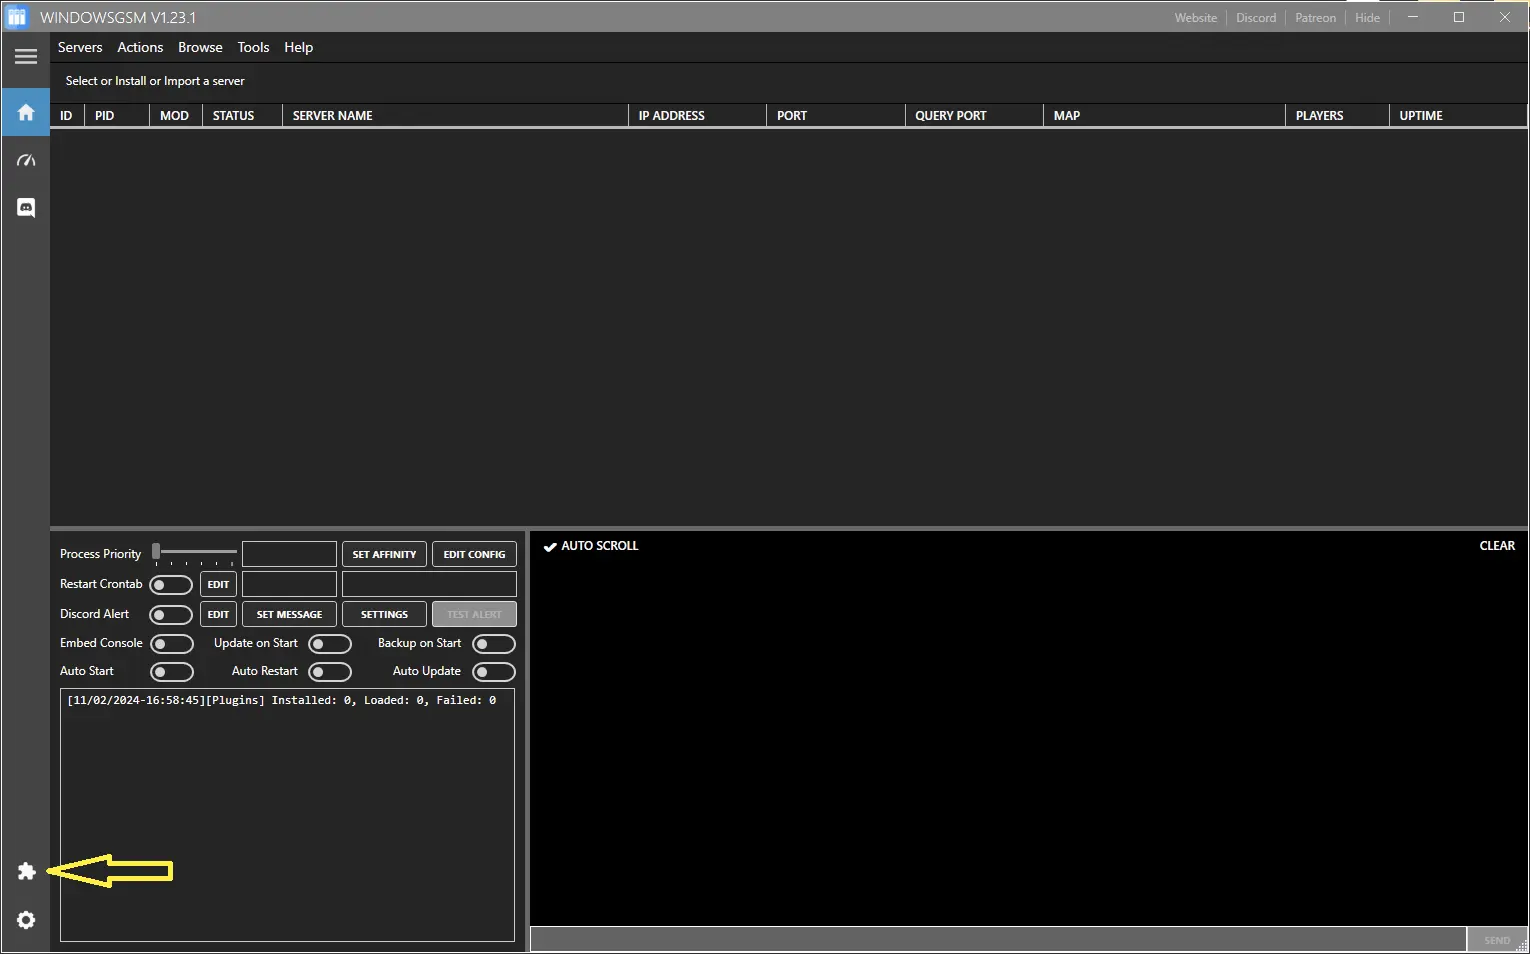
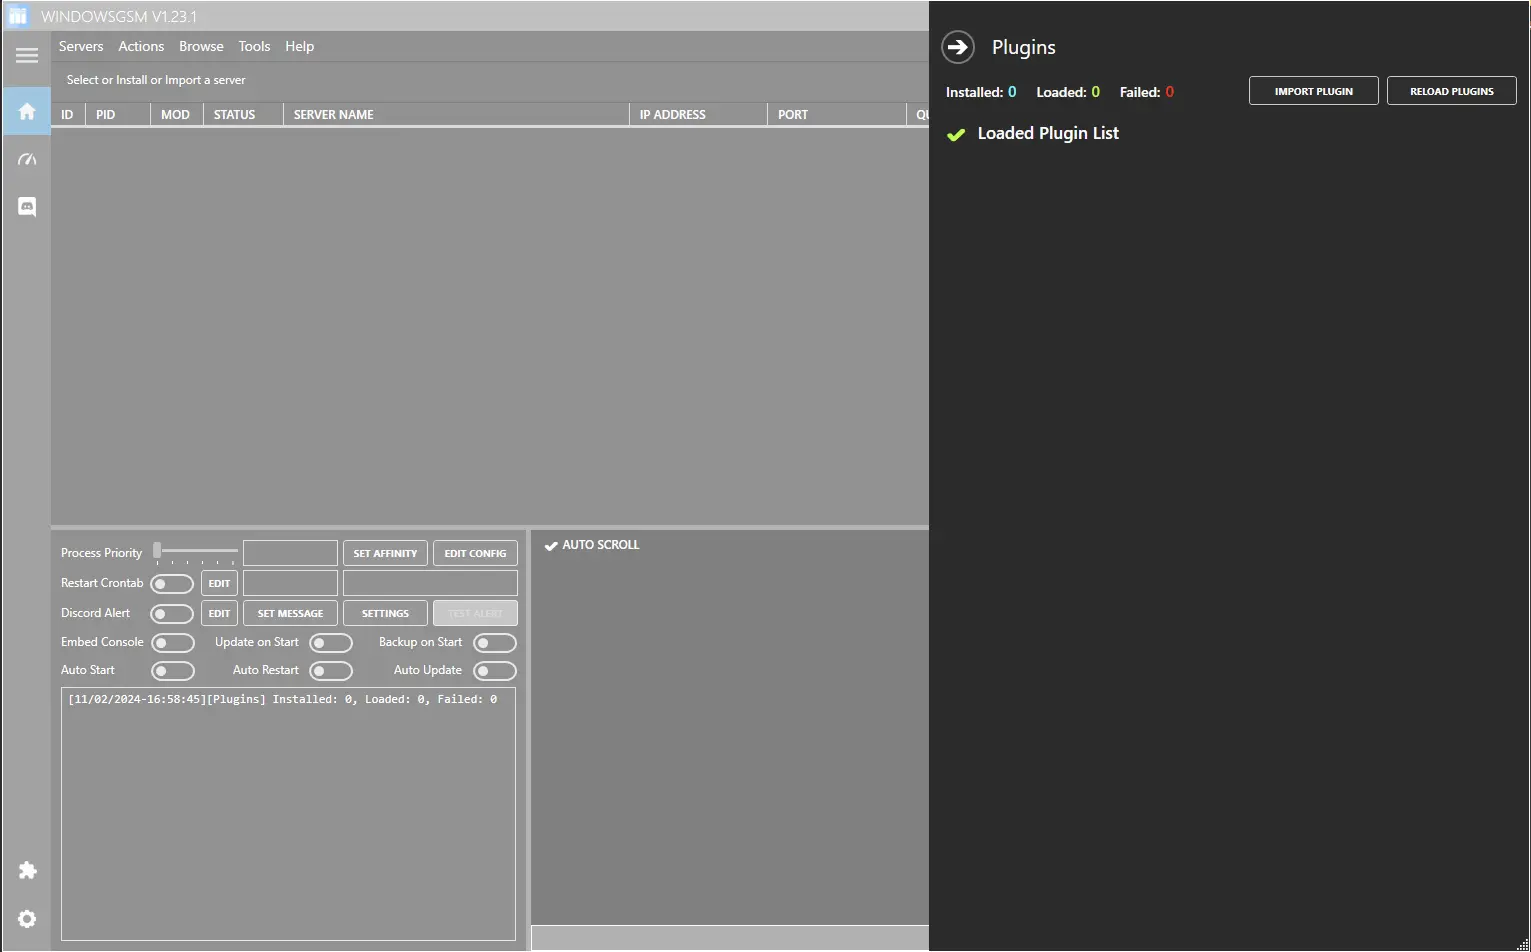
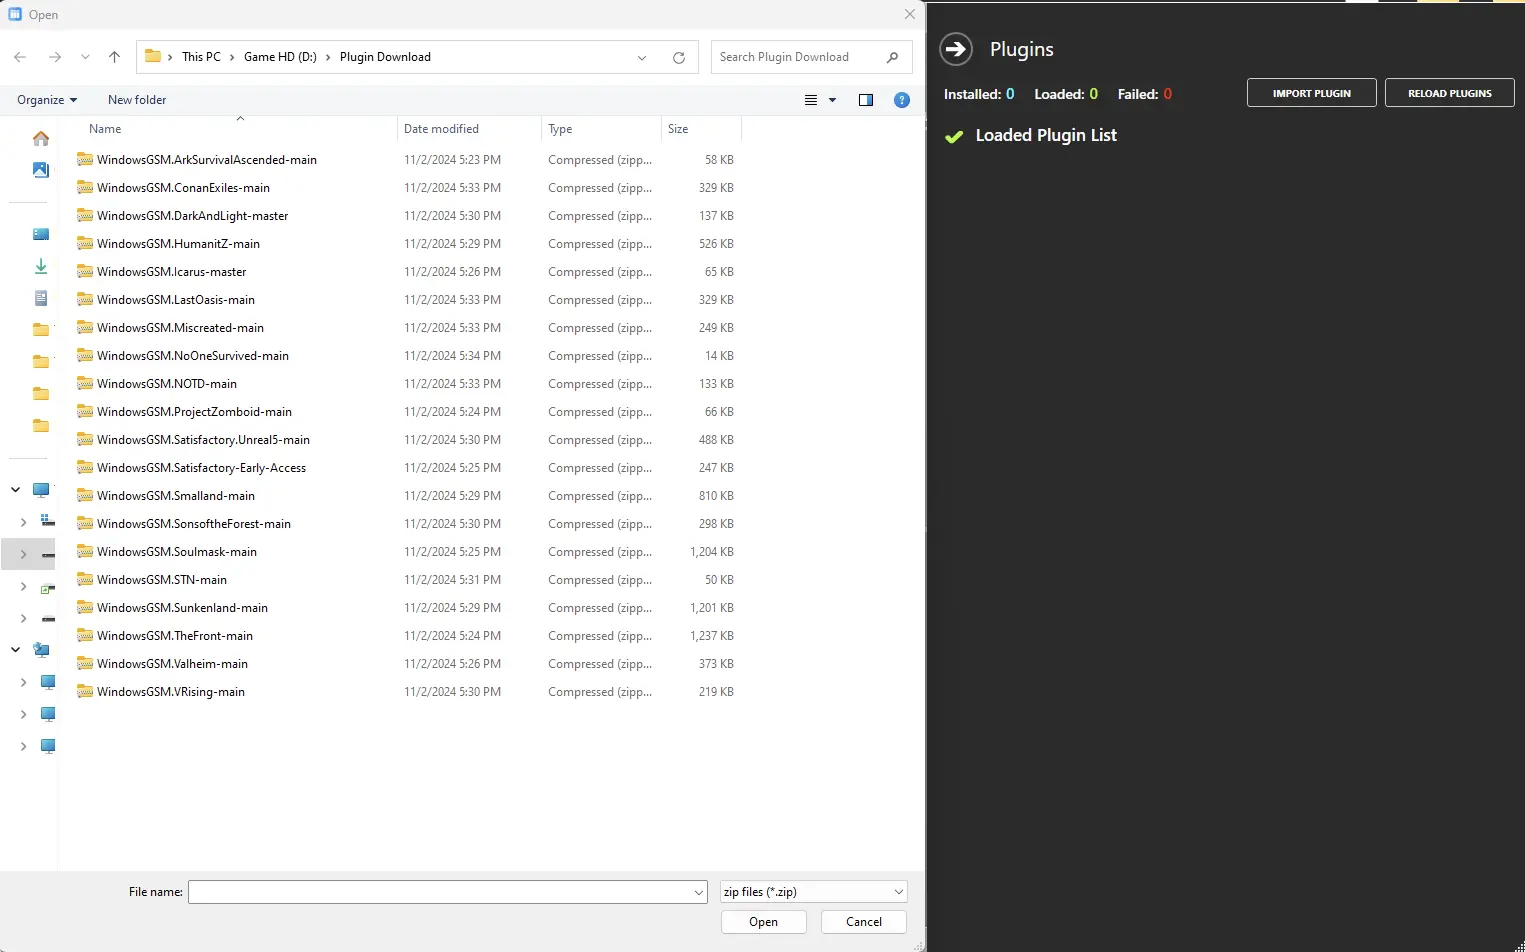
Click on the puzzle piece Icon, that will cause the plugin window to slide open. Next we will import the plugin. Simply click the import plugin button and a window will open up, navigate to where you downloaded the plugin file, select the zipped file, (do not unzip) and click open.
Step 3 Install the Server
Now that the plugin, (server setup instructions) are installed, we need to install the server.
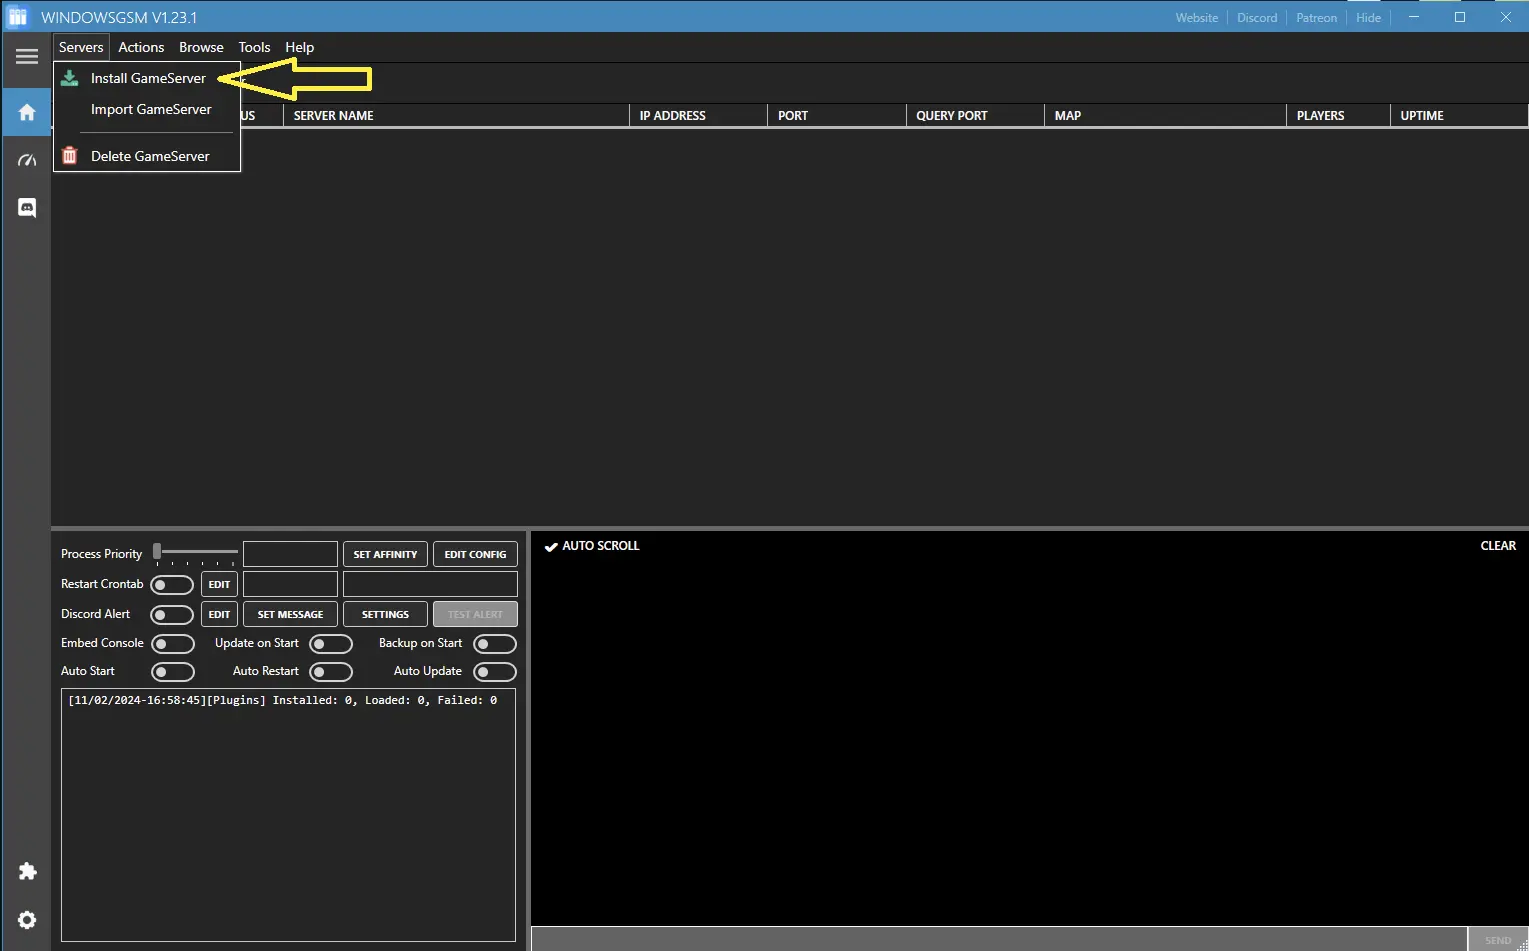
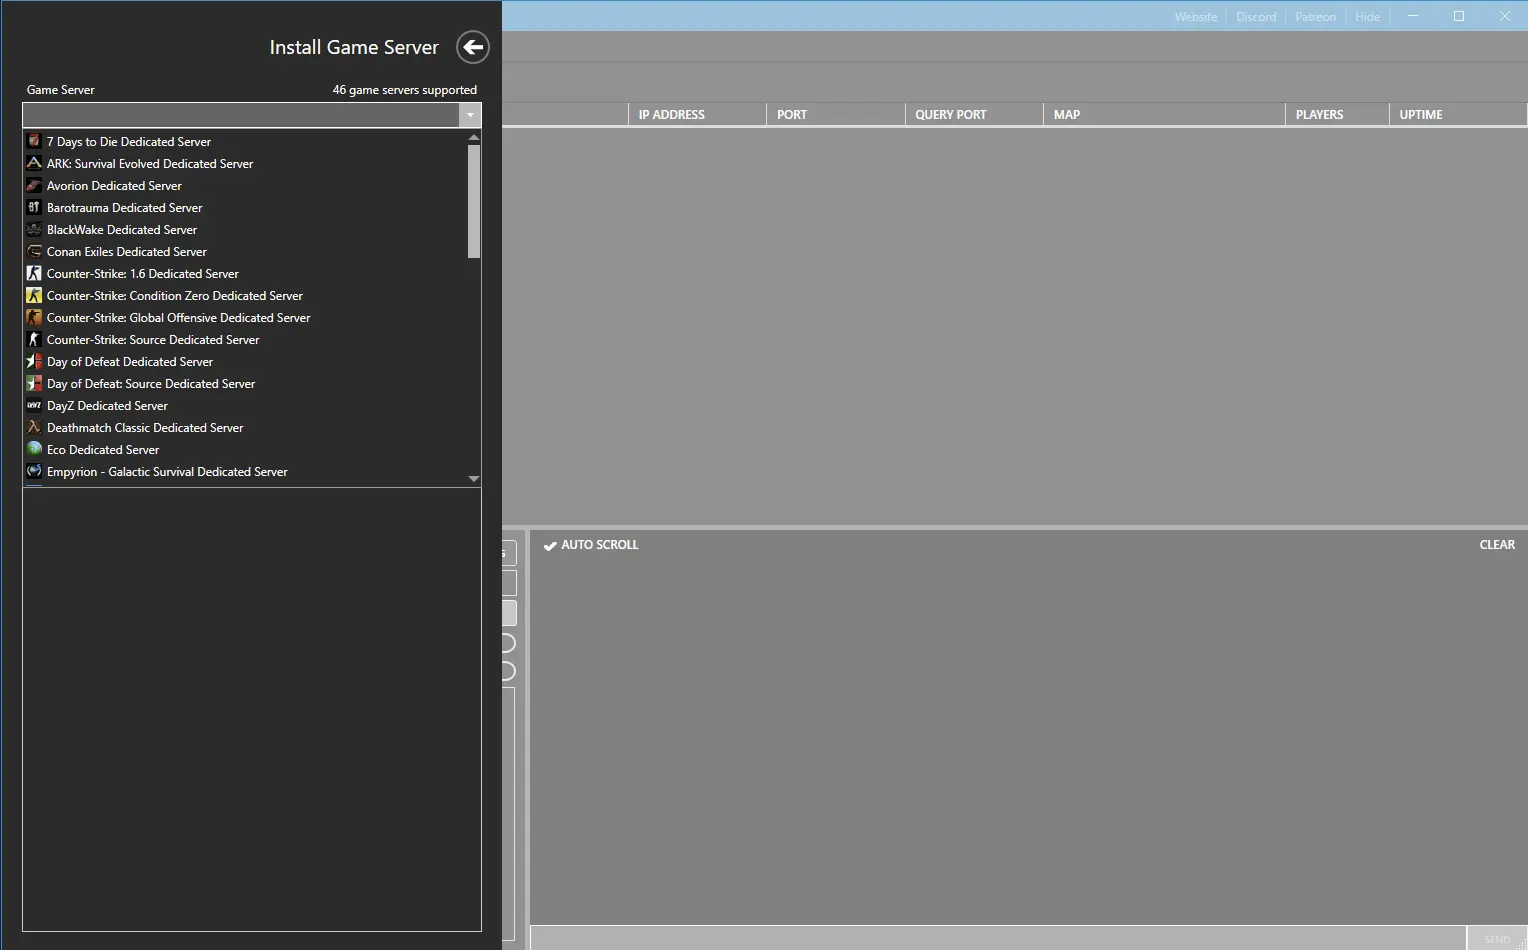
Click on install game server, and select your game from the list. After Selecting from the list, give the server a name, This is just the name that is shown inside WindowsGSM and not the actual name of the game server. This can also be changed later, but it is much easier to go ahead and change it now. Then click install and wait for your server to download and install.
Step 4 Open The Ports
You will need to open the following ports.
- 27047 Steam Port
- 27048 Query Port
- 27049 Game Port
If you don’t know how to forward ports in your router, this page should have everything you need. It is normally easy to do once you have a general understanding of what you are trying to accomplish and if you have the username and password to the router. See how to open ports HERE for more help.
Step 5 Server Configuration
Normally, You would follow the instructions in green, However that does not seem to be working currently so you can skip it for now. This could change with any server update so I will leave the information as it is normally how you would edit the server configuration file.
Server Configuration, At the top of Windows Server Manager under Browse Server Files, which opens windows file explorer and automatically locates your server files.
Browse/Server Files/TheFrontManager/Server Config
Nomally you would click and edit this file with notepad or notepad+ However, this does not seem to have much effect on your server. The best way to make changes is to edit Config in WindowsGSM
INSTEAD
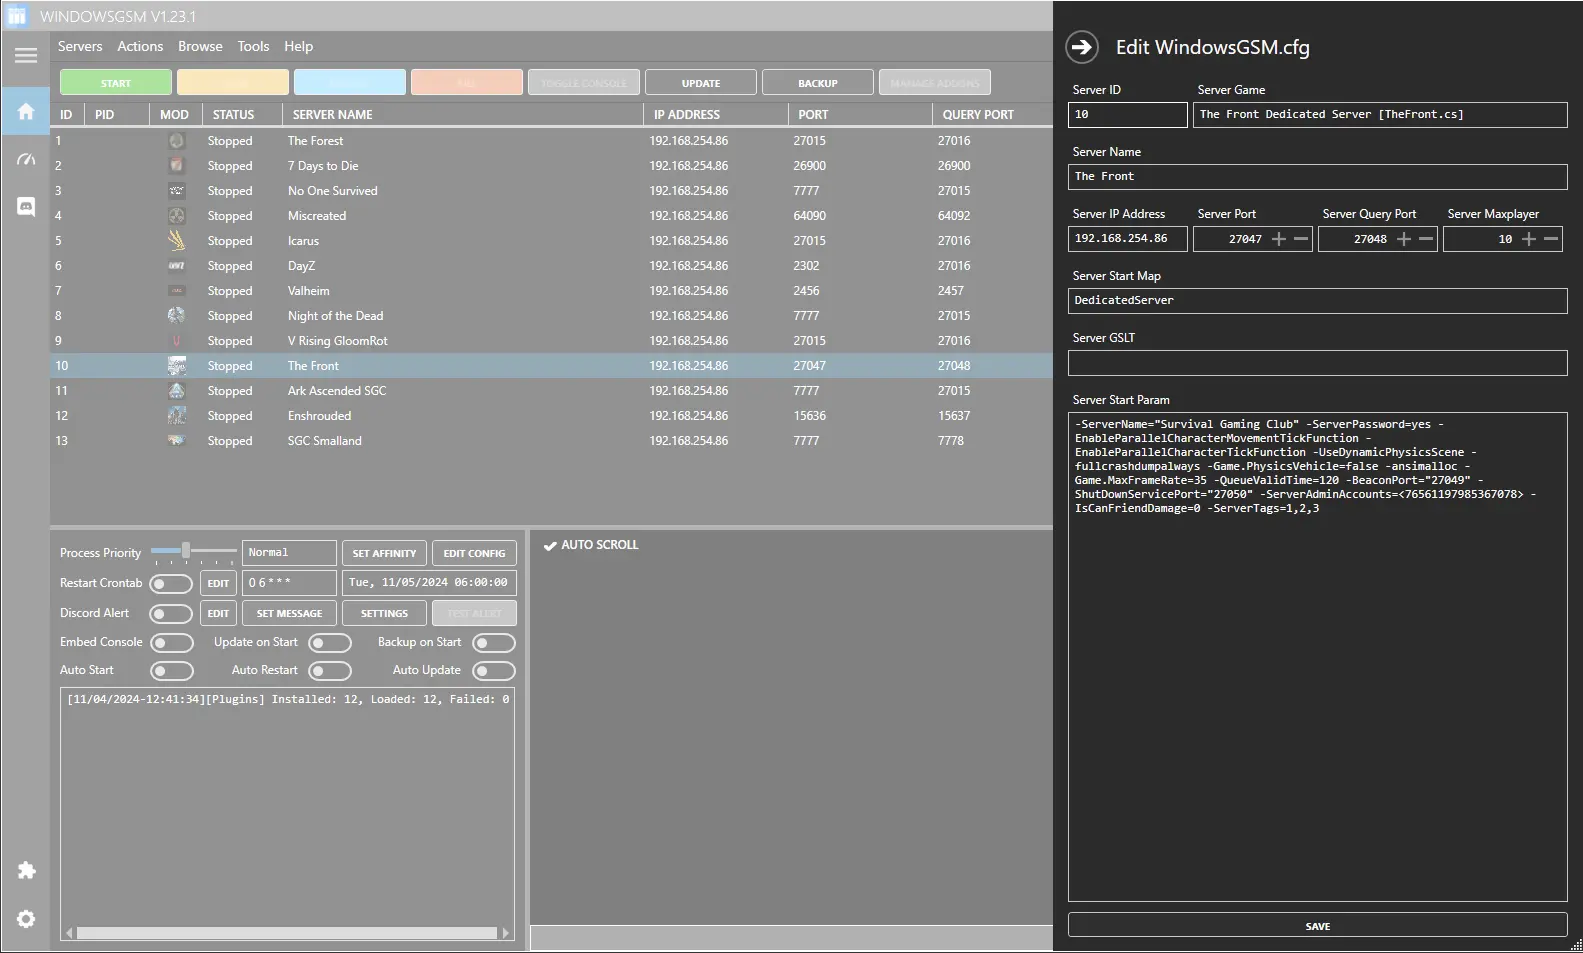
Select the server, click the edit config button and this window will open up, under Server Star Param, Copy and paste the following code and change the name, to the server name you want listed.
-ServerName=”Myos Cool Server” -ServerPassword=mycoolpassword
Anything rules you want to adjust add a – and a command from the list below
(example)
-IsShowBlood=1 -ServerName=”Myos Cool Server” -ServerPassword=
As always I recommend using Note++ to edit any config file.
My Config provided for editing example
-ServerName=”Your Cool Server” -ServerPassword=yes -EnableParallelCharacterMovementTickFunction -EnableParallelCharacterTickFunction -UseDynamicPhysicsScene -fullcrashdumpalways -Game.PhysicsVehicle=false -ansimalloc -Game.MaxFrameRate=35 -QueueValidTime=120 -BeaconPort=”27049″ -ShutDownServicePort=”27050″ -ServerAdminAccounts=<76561197985367078> -IsCanFriendDamage=0 -ServerTags=1,2,3
Notes:
- To remove the password, remove the complete -ServerPassword=yes line.
- Other than the name change most people probably won’t have to change any of these settings.
Options
[BaseServerConfig]
ServerName=”Survival Gaming Club”
ServerPassword=
QueueThreshold=24
ServerFightModeType=1
IsCanSelfDamage=1
IsCanFriendDamage=0
ClearSeverTime=
UseSteamSocket=1
Port=27047
BeaconPort=27049
ShutDownServicePort=27050
QueryPort=27048
SaveWorldInterval=300
GMOverlapRatio=1
IsUnLockAllTalentAndRecipe=0
GMBagInitGirdNum=40
GreenHand=1
CharacterInitItem=
GMDeathDropMode=1
GMDeathInventoryLifeSpan=1800
CorpsePickAuthority=2
GMCanDropItem=1
GMCanDiscardItem=1
GMDiscardBoxLifeSpan=300
GMRebirthBaseCD=10
GMRebirthExtraCD=1
GMPenaltiesMaxNum=5
GMPenaltiesCD=600
ConstructEnableRot=1
GMAttackCityCdRatio=1
OpenAllHouseFlag=0
IsCanChat=1
IsShowBlood=1
SensitiveWords=1
HealthDyingState=1
UseACE=1
ServerAdminAccounts=<76561197985367078>
IsShowGmTitle=1
PlayerHotDefAddRate=1
PlayerIceDefAddRate=1
HeadNameDisplayDist_Team=200
HeadNameDisplayDist_Enemy=20
PlayerDeathAvatarItemDurableRate=0
PlayerDeatShortcutItemDurableRate=0
GMCraftTimeRate=1
PlayerAddExpRate=1
PlayerKillAddExpRate=1
PlayerFarmAddExpRate=1
PlayerCraftAddExpRate=1
MoveSpeedRate=1
JumpRate=1
PlayerLandedDamageRate=1
PlayerMaxHealthRate=1
HealthRecoverRate=1
PlayerMaxStaminaRate=1
StaminaRecoverRate=1
PlayerStaminaCostRate=1
PlayerMaxHungerRate=1
GMHungerDecRatio=1
GMBodyHungerAddRate=1
MaxBodyWaterRate=1
GMWaterDecRatio=1
GMBodyWaterAddRate=1
MaxBreathRate=1
BreathRecoverRate=1
PlayerBreathCostRate=1
GMPlayerHealthRate=1
GMFoodDragDurationRate=1
NpcRespawnRatio=1
AnimalBodyStayTime=300
HumanBodyStayTime=10
GMNPCLootableItemRatio=1
NpcSpawnLevelRatio=1
WildNPCDamageRate=1
WildNPCHealthRate=1
WildNPCSpeedRate=1
CityNPCLevelRate=1
CityNPCDamageRate=1
CityNPCHealthRate=1
CityNPCSpeedRate=1
CityNPCNumRate=1
NpcDisplayDistance=100
GMInventoryGainRate=1
GMCityATKNPCLootItemRatio=1
GMMaxHouseFlagNumber=1
GMSetGJConstructMaxNumRatio=1
GMHFTrapMaxNum=0
GMHFTurretMaxNum=0
GMConstructDefenseRatio=1
GMTrapDefenseRatio=1
GMTurretDefenseRatio=1
GMTrapDamageRatio=1
GMTurretDamageRatio=1
GMConstructMaxHealthRatio=1
GMConstructReturnHPRatio=1
GMHouseFlagRepairHealthRatio=1
GMTTC_Oil_Rate=1
GMWaterCollecter_Rate=1
GMTTC_Ore_Rate=1
GMTTC_Fish_Rate=1
CHFDamagedByPlayer=1
CHFDamagedByVehicle=1
CHFDamagedByNpc=1
GMHouseFlagExcitantTime=1
GMMaxRetrieveProductsRate=1
GMTreeGainRate=1
GMBushGainRate=1
GMOreGainRate=1
GMCropVegetableReapRatio=1
GMFleshGainRate=1
GMCropVegetableGrowRatio=1
GMMeleeNpcDamageRatio=1
GMRangedNpcDamageRatio=1
GMMeleePlayerDamageRatio=1
GMRangedPlayerDamageRatio=1
GMMeleeConstructDamageRatio=1
GMRangedConstructDamageRatio=1
GMToolDamageRate=1
GMDurabilityCostRatio=1
GMVehiclePlayerDamageRatio=1
GMVehicleConstructDamageRatio=1
GMVehicleDamageRate=1
IsCanMail=1.000000
ServerTags=1,2,3
