How to Host a Night of the Dead Dedicated Server
Welcome to our guide on setting up a Night of the Dead dedicated server, whether you are looking to set up a server for your own personal use or a Night of the Dead dedicated server for a larger community to enjoy. Playing multiplayer games on a self-hosted or dedicated server offers players a unique and customizable gaming experience. By setting up their own server, players have the freedom to create their own rules, mods, and gameplay options, leading to a more personalized and immersive gaming experience. By following our step-by-step instructions, you will be able to quickly and easily set up your own Night of the Dead self hosted server and start playing with friends or fellow gamers in no time. So, let’s get started and create the ultimate gaming experience with your very own Night of the Dead server!
We assume you have already read the in’s and out’s of running your own server, things like the monthly costs, the hardware, and leaving your computer up 24/7. If you have not I recommend starting with this quick read, It can save you hours of time and frustration. I also assume you have already installed WindowsGSM, but if you haven’t start with that HERE.
NOTE: Currently if your router doesn’t support Nat Loopback, Your server will be up and running but you will not be able to connect. (Mine showed the I.P address instead of a server name) You can get around this by using an outside internet connection like a mobile hotspot or you can connect with a VPN. I used Protonmail VPN. It was easy to setup and worked great.
You can also host this game from GPortal, Paying for hosting has advantages and disadvantages, you can read about those HERE. IF you decide to use paid hosting, friends of the site get 10% off and it helps support me.
Step 1 Find the Server Instructions
First you need to find your server instructions. Some of the server instructions are built into WindowsGSM and do not require a plugin. Since new games are released all the time many games are not built into WindowsGSM and do require a plugin. The plugin is simply instructions for WindowsGSM to find the server on Steam and install the server inside of WindowsGSM. There are dozens of server plugins that are available for your use, If it is a brand new game you can request a plugin in WindowsGSM Discord. You can find a list of all the dedicated server plugins quite easy on the WindowsGSM website. All of the plugins on that site link out to GitHub. But Alas, I have a direct link to the plugin download just for you!
Download the Night of the Dead Plugin. Click on the green get code button and download the Zip file.
Download Note++
Step 2 Install the Plugin
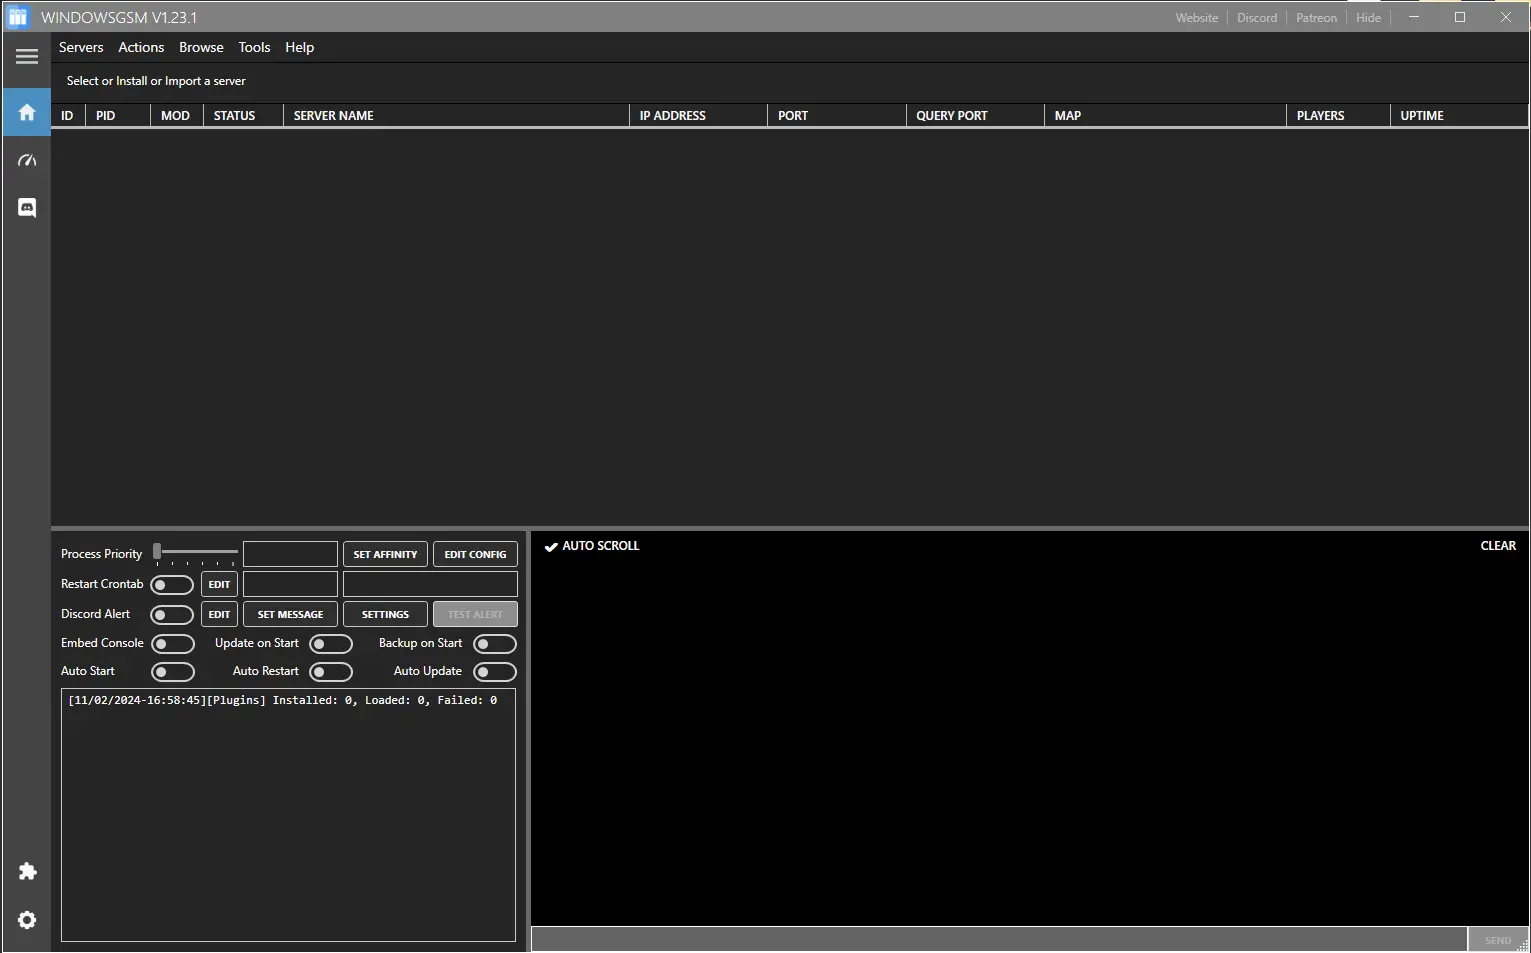
In this case a plugin is required and now that we downloaded it we have to insert it into the WindowsGSM program.
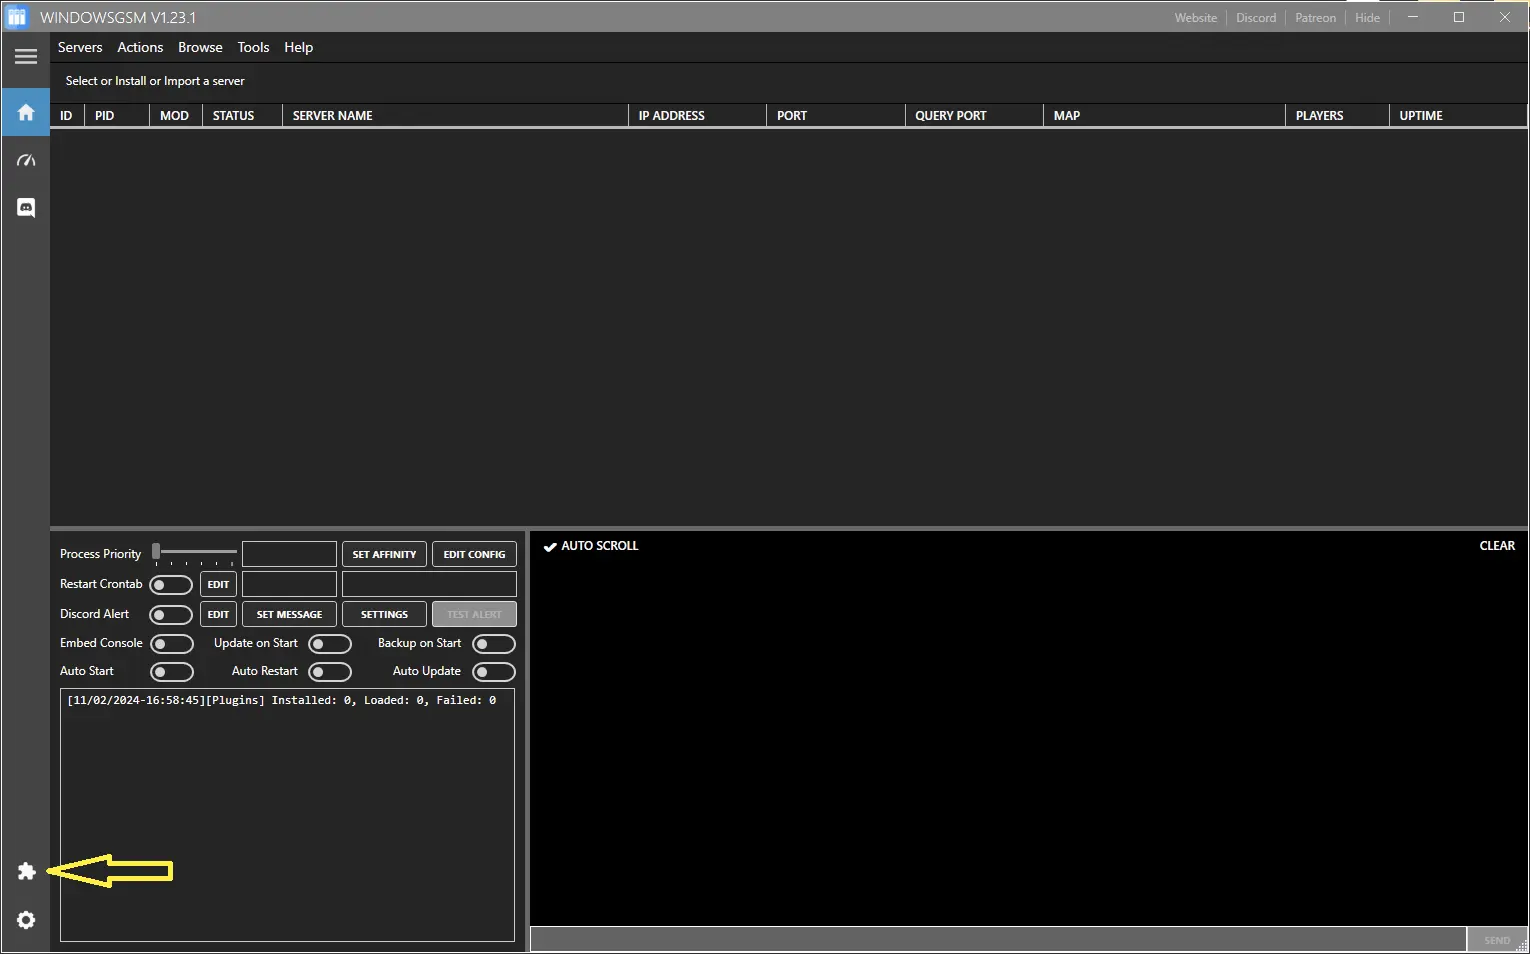
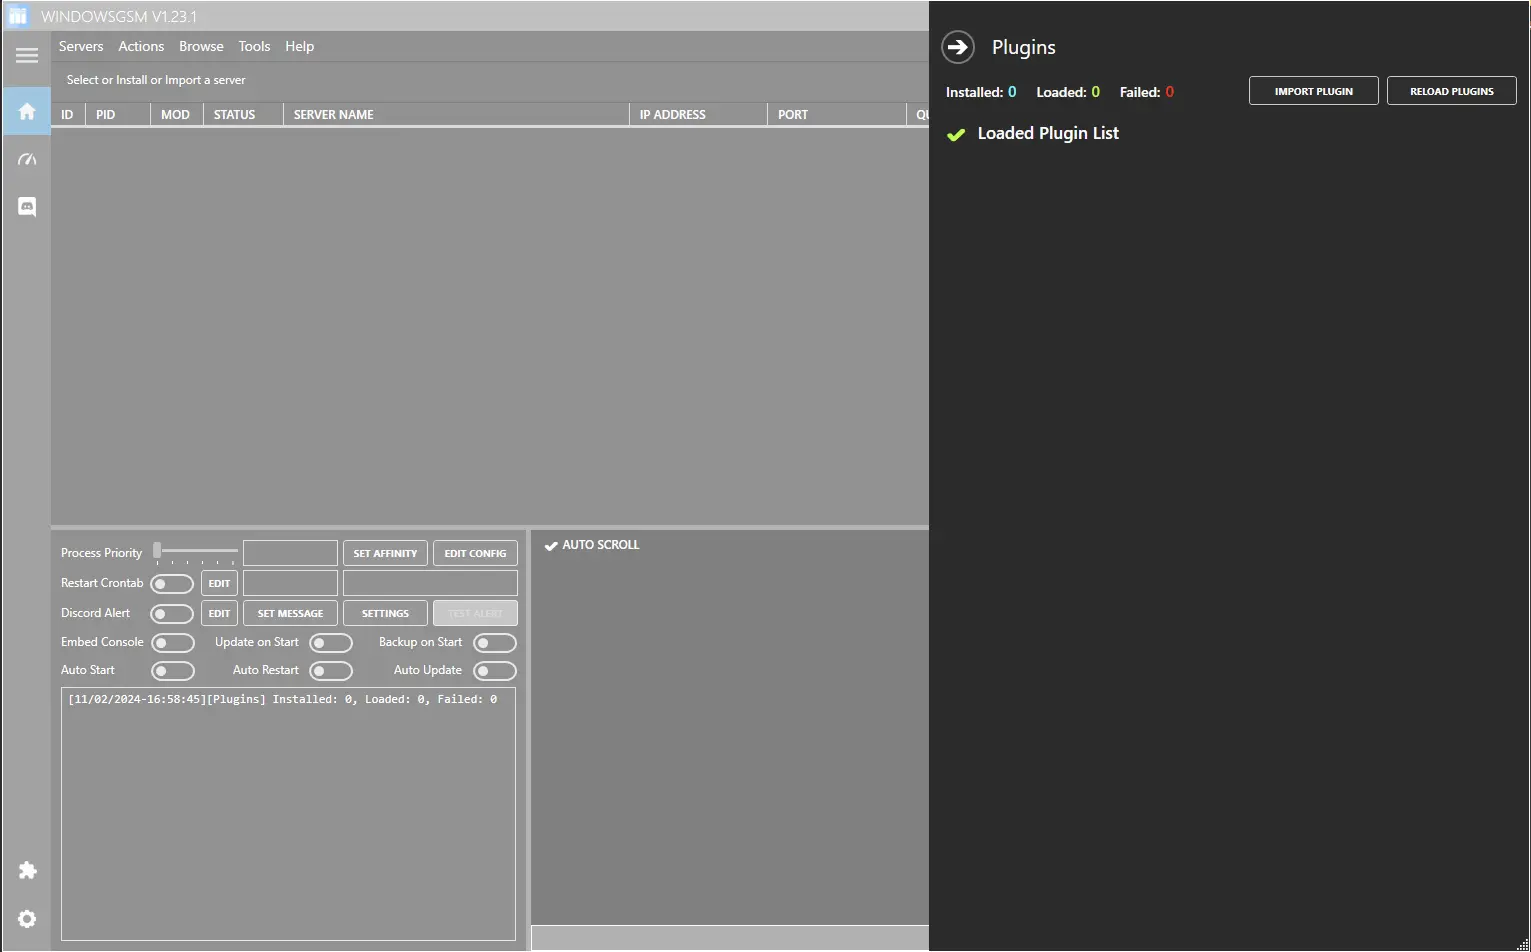
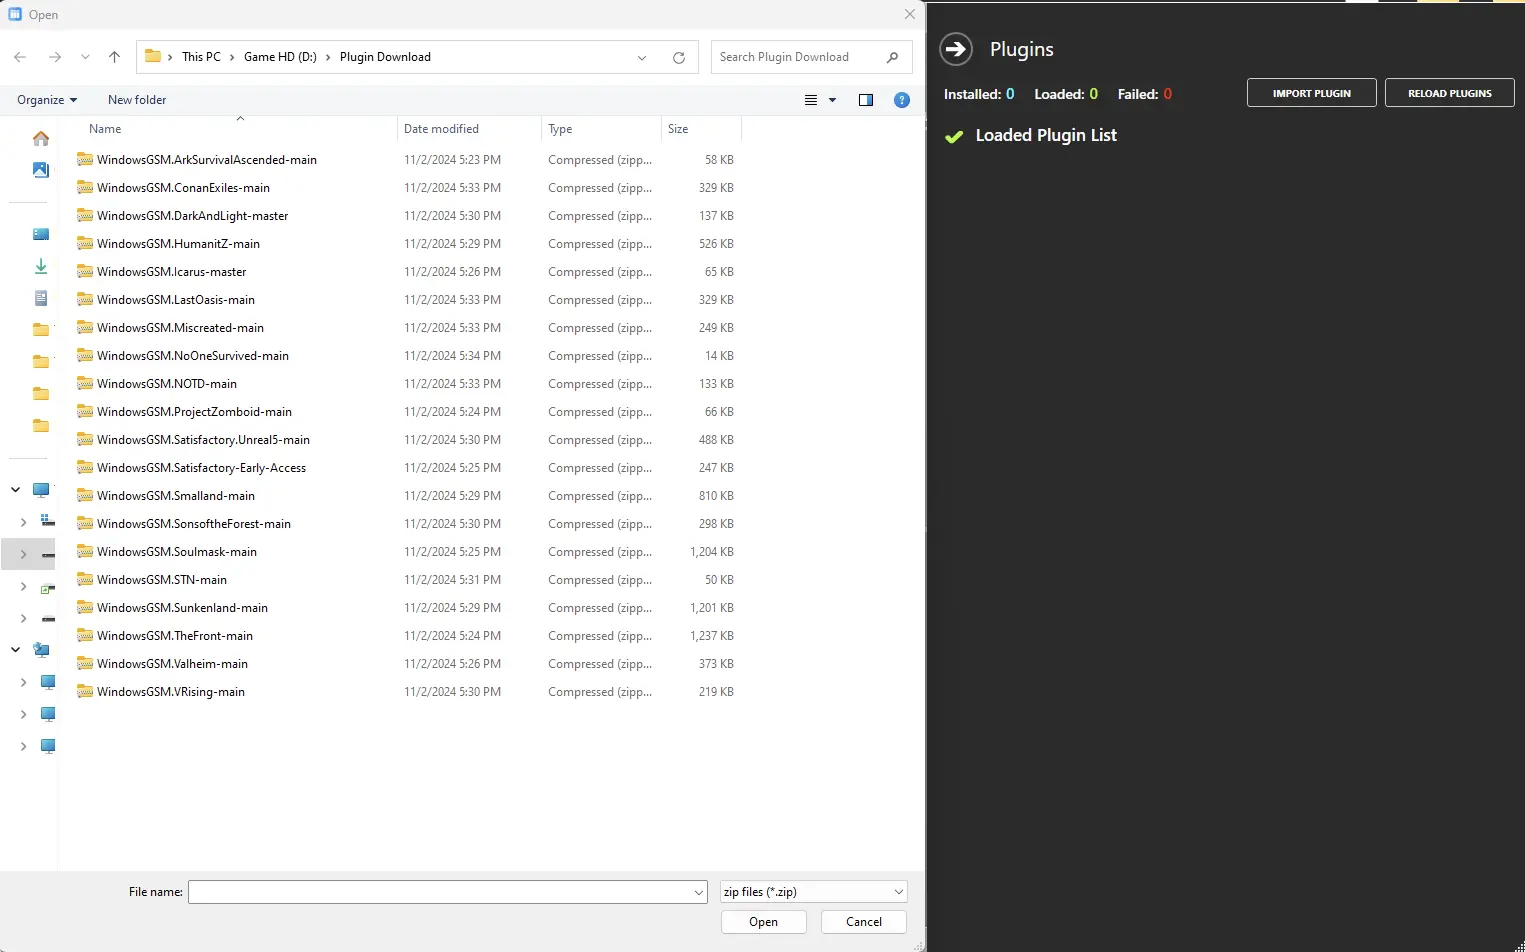
Click on the puzzle piece Icon, that will cause the plugin window to slide open. Next we will import the plugin. Simply click the import plugin button and a window will open up, navigate to where you downloaded the plugin file, select the zipped file, (do not unzip) and click open.
Step 3 Install the Server
Now that the plugin, (server setup instructions) are installed, we need to install the server.
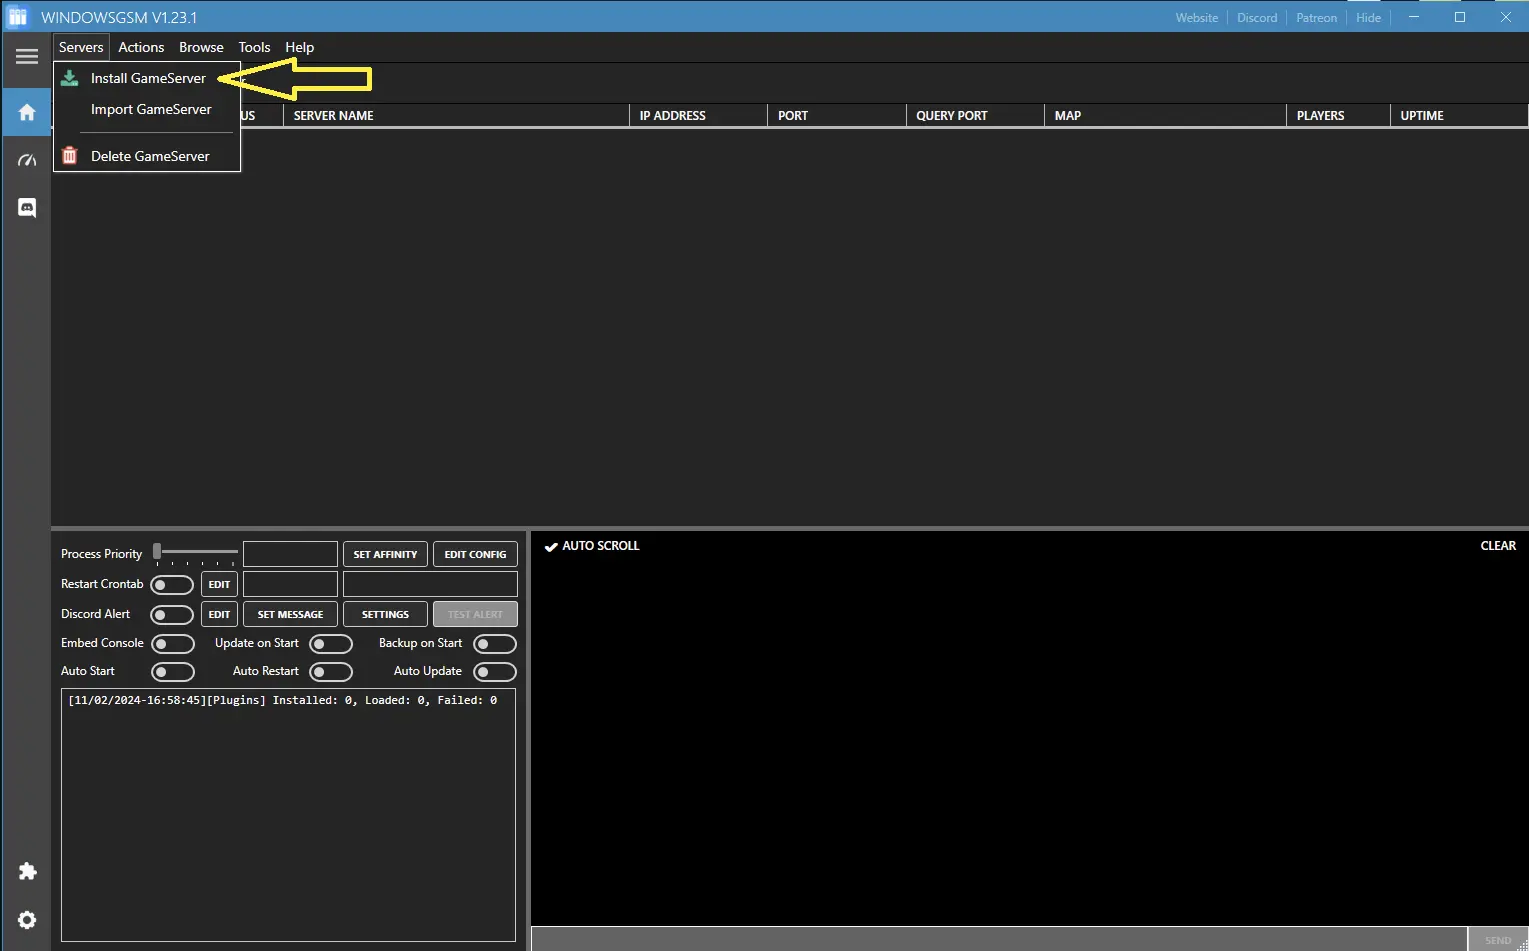
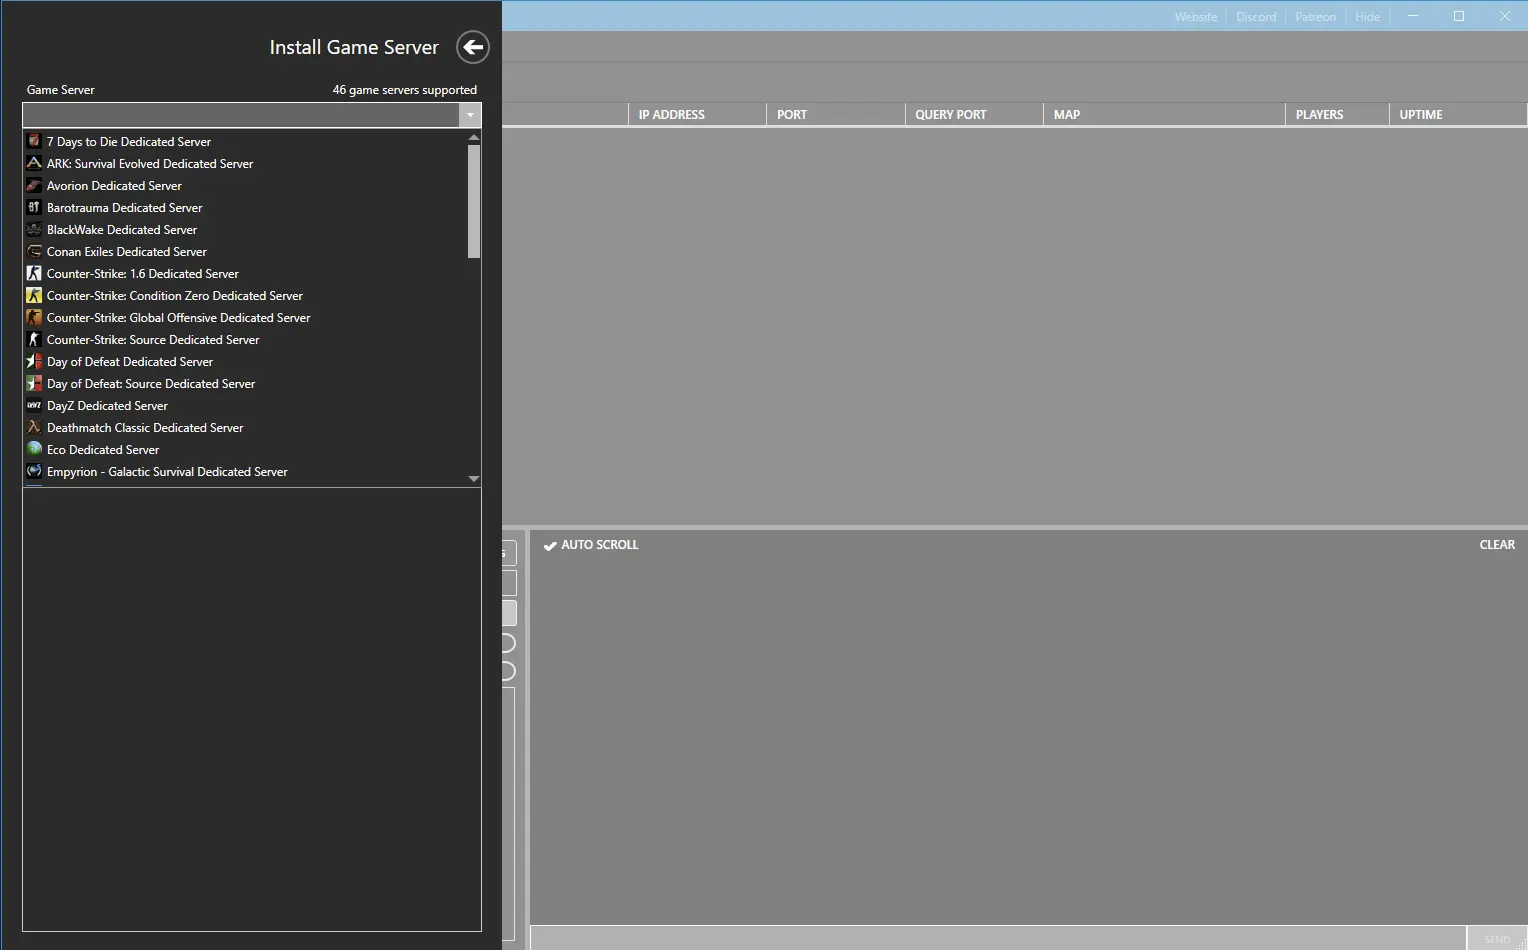
Click on install game server, and select your game from the list. After Selecting from the list, give the server a name, This is just the name that is shown inside WindowsGSM and not the actual name of the game server. This can also be changed later, but it is much easier to go ahead and change it now. Then click install and wait for your server to download and install.
Step 4 Open The Ports
You will need to open the following ports.
- 7777
- 27015
If you don’t know how to forward ports in your router, this page should have everything you need. It is normally easy to do once you have a general understanding of what you are trying to accomplish and if you have the username and password to the router. See how to open ports HERE for more help.
Step 5 Server Configuration
Click on Night of the Dead in the server list, at the top of WindowsGSM go to browse then server files. Once that open select the Serversettings.ini file and copy it. Go to the following folder path
LF\Saved\Config
Paste the file you just copied into here on a black space in the folder, it should ask if you want to overwrite the file in there select yes. (the current file is blank).
Right click and edit that file with Note++ making changes to
- Servername
- Server Password
Backup to the main folder Serverfiles (where you copied the .ini from). Their are two batch files choose one, either with the anticheat or without and edit that file again with note++.
- ?listen -DisableAntiCheat -log -Port=7777 -QueryPort=27015 -CRASHREPORTS
- ?listen -ListOnSteam -log -Port=7777 -QueryPort=27015 -CRASHREPORTS
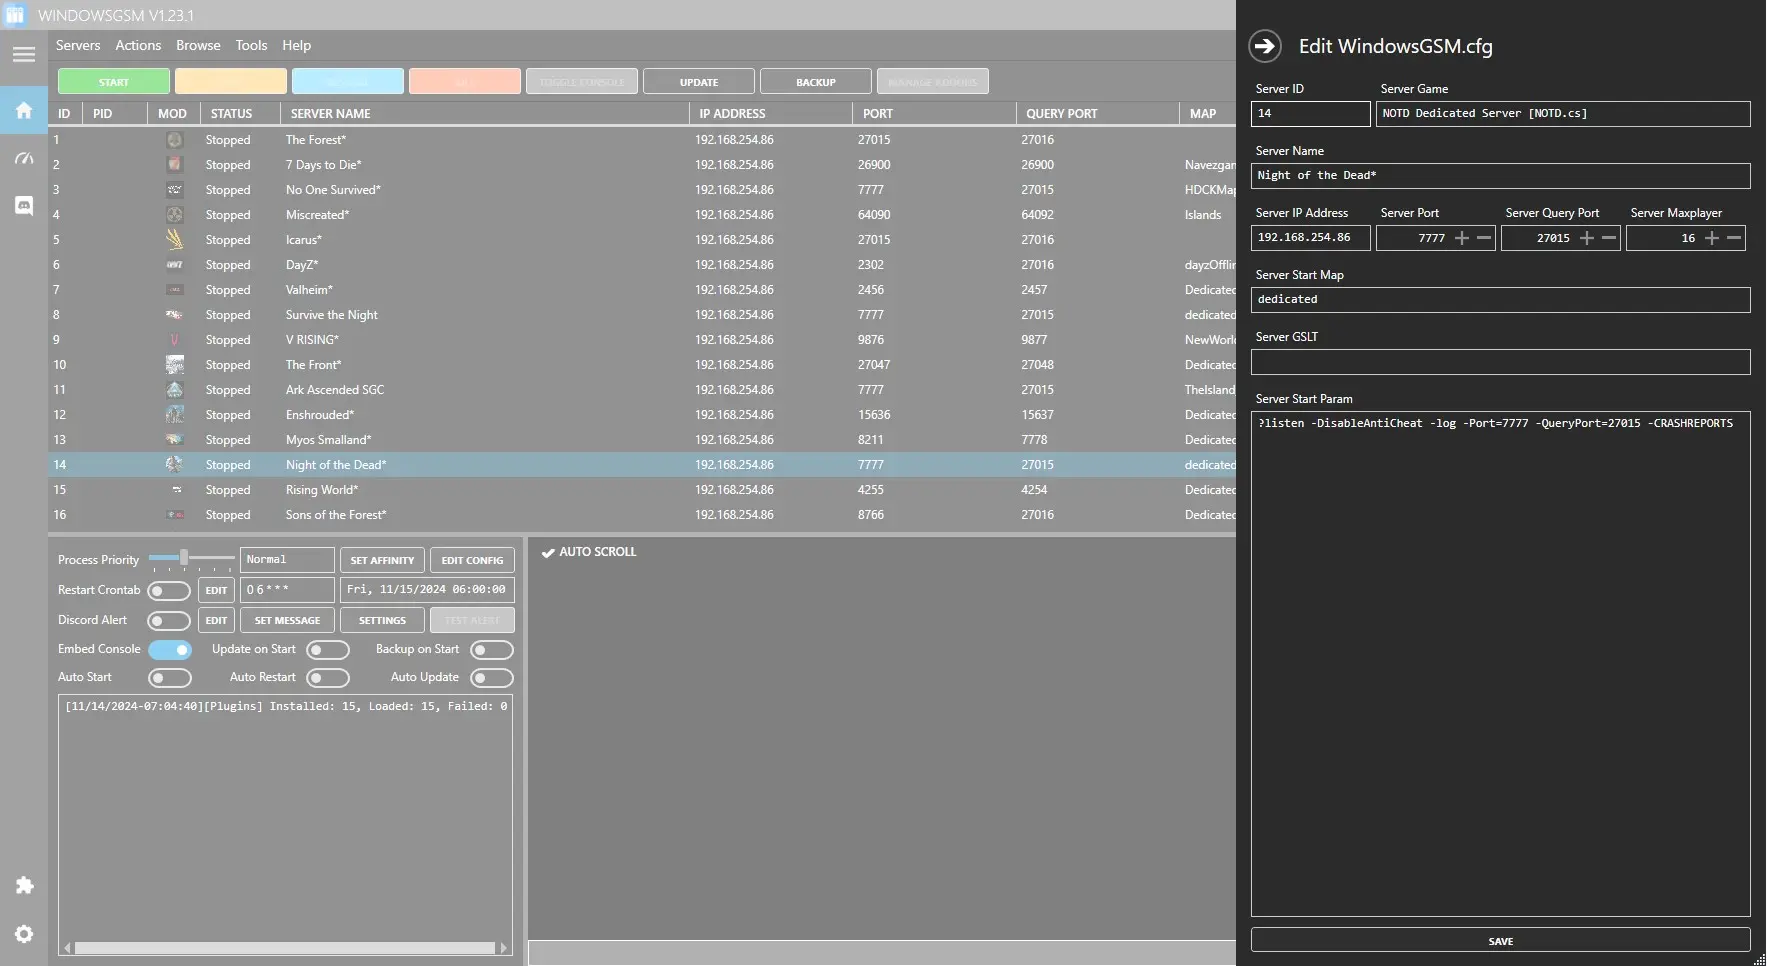
Copy one of the lines of code, exit that window, while remaining on Night of the Dead server select the Edit config window and paste the code into the Server Start Param box, and save.
Options
[ServerSettings]
ServerName=Survival Gaming Club
Password=none
MaxPlayers=16
[SystemSettings]
IngameAdminPassword=test
DefaultMessageOfTheDay=Survivalgamingclub.com
; INSTALL_DIR/Saved/SaveGames/SAVE_NAME
SaveName=SAVE_NAME
; In-game hour, integer, Default: 1 = 5 min(realtime).
SaveIntervalHour=2
[GameSettings]
; Peaceful/Easy/Normal/Hard/Survival/Challenge/Legend/Custom
Difficulty=Normal
[GameSettings/General]
; 0=disable, 1=enbale
NoWave=0 // No Wave
NoSpawnBuildingBlocker=0 // Activate Building Forbidden Area
NoZombieRespawn=0 // No Zombie Respawn
NaturalObjectRespawn=0 // Natural Objects Respawn
SyntheticObjectRespawn=0 // Synthetic Object Respawn
NoGeneratorTrouble=0 // No Generator Breakdown
NoDeathResearchDrop=0 // No Research Lost Upon Dying
DropItemsOnExit=0 // Drop Items on Exit
Hardcore=0 // Hardcore
NoTeamKill=0 // No Teamkill
NoEnding=0 // No Ending
; 0=PvP, 1=PvE
MODSelect=1 // Mode
; It works only when the difficulty is Custom.
[GameSettings/Basic]
; 0 <= value <= 100
NormalZombieHealth=17 // Light Zombie HP
SpecialZombieHealth=17 // Heavy Zombie HP
GiantZombieHealth=17 // Giant Zombie HP
ZombieDamage=18 // Zombie Damage
ZombieMovementSpeed=35 // Zombie Movement Speed
WorldZombieSpawn=17 // World Zombie Spawn Amount
WaveZombieHealth=25 // Wave Zombie HP
WaveNormalZombieAmount=44 // Light Zombie Amount
WaveSpecialZombieAmount=17 // Heavy Zombie Amount
WaveGiantZombieAmount=21 // Giant Zombie Amount
AnimalHealth=17 // Animal HP
AnimalDamage=18 // Animal Attack Damage
; 30 / 60 / 120 / 180 / 240
WorldNormalZombieRespawnTime=120 // Light Zombie Respawn Time
; 120 / 300 / 600 / 900 / 1200
WorldSpecialZombieRespawnTime=600 // Heavy Zombie Respawn Time
; 120 / 300 / 600 / 900 / 1200
WorldGiantZombieRespawnTime=600 // Giant Zombie Respawn Time
; It works only when the difficulty is Custom.
[GameSettings/Advanced]
; 0 = disable, 1 = enable
NoExperienceLoss=0 // No EXP Lost Upon Dying
NoDeathItemDrop=0 // No Items Drop Upon Dying
NoDeathEquipmentItemDrop=0 // No Equipment Drop Upon Dying
; 0 <= value <= 100
ResearchDataConsumption=50 // Research Data Consumption
FishSpeed=66 // Fish Speed
BuildingHit=90 // Building HP
TrapDamage=66 // Trap Attack Damage
ResourcesReturnedAfterBuildingDestroyed=30 // Materials Return Rate After Building Destruction
FishingGaugeDecrease=40 // Fish Power
SuperiorOrHigherEquipmentGainMultiplier=40 // High-Grade Equipment Drop Rate
; 1 / 2 / 3 / 4 / 5
AmountOfExperienceGained=1 // Gain EXP Amount
; 1 / 2 / 3
ResourceAcquisition=1 // Item Obtained Amount
; 0 / 1 / 2 / 5 / 10 / 12 / 15
InitialFoodAmount=10 // Initial Food Amount
; 240 / 360 / 480 / 720 / 840 / 960 / 1200
NaturalObjectRespawnTime=0 // Natural Objects Respawn Time
SyntheticObjectRespawnTime=0 // Synthetic Objects Respawn Time
; 1 / 1.25 / 1.5 / 1.75 / 2
FarmResourceOutput=1.25 // Farm Resource Production Amount
; 0.5 / 1 / 1.5 / 2 / 2.5
MachineResourceOutput=1.25 // Machine Resource Production Amount
; 0.5 / 1 / 1.5 / 2 / 2.5
AnimalTrapTime=1 // Animal Trap Time
; 0.5 / 1 / 1.5
FarmResourceProductionTime=1 // Farm Resource Production Time
MachineResourceProductionTime=1 // Machine Resource Production Time
; 0.5 / 1 / 1.5 / 2 / 2.5
ElectricGeneration=1 // Power Generated
; 0.5 / 1 / 1.5
ElectricConsumption=1 // Power Consumption
; 0.5 / 1 / 1.5 / 2 / 2.5
ElectricOvercurrentLimit=1 // Power Limit
; 0.5 / 1 / 1.5
ElectricStandbyPower=1 // Standby Power
; It works only when the difficulty is Custom.
[GameSettings/Detail]
; 60 / 120 / 180 / 240 / 300
OneDayTime=120 // Times per Day
